3.1 Using Software Templates
Software Templates in Backstage enable self-service for developers. Instead of copying boilerplate code or following lengthy setup guides, developers can use templates to scaffold new projects with best practices built in. It is one of the Core Features that is included by default.
This chapter will teach you how to create and use templates effectively.
Understanding Software Templates
Software Templates (also called Scaffolder Templates) allow you to:
- Standardize project setup: Ensure all projects follow organizational best practices
- Reduce onboarding time: New developers can create production-ready projects in minutes
- Enforce compliance: Build in security, monitoring, and governance from day one
- Accelerate development: Eliminate repetitive setup tasks
Note
Templates use a declarative YAML format and can integrate with Git providers, CI/CD systems, and other tools to fully automate project creation.
The heavy lifting for project setup is to glue everything together. That is the great strength of Scaffolder Templates.
Task 3.1.1: Explore Existing Templates
Before creating your own template, let’s explore what’s available by default.
Run the default template
- Navigate to http://localhost:3000/create
- Click the
choosebutton on theExample Node.js Templatecard to select the example template - Set any value for
Name, yourOwnerand theRepository - Click on
reviewto check your input - Create it by using the
createdbutton
Warning
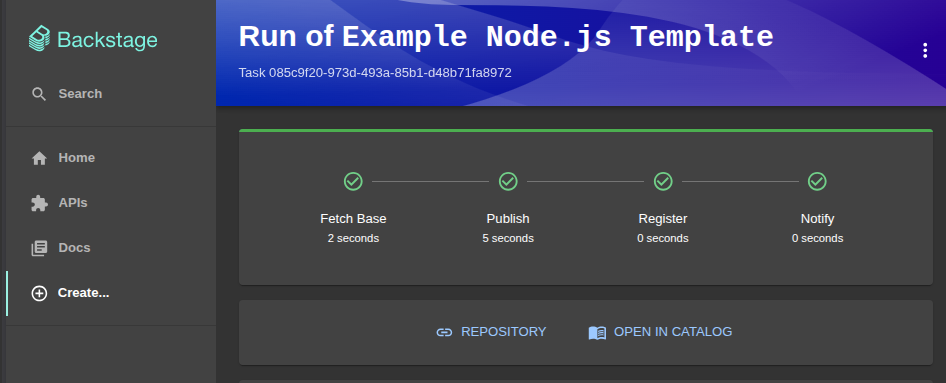
You will get an error and stacktrace. This is because your Backstage instance has no right to create Repositories. A GitHub integration is missing for this. We do not cover this here. Find the implementation inside the Additional Labs .The successful scaffolding of a template looks like this:
Task 3.1.2: Create a Template with Multiple Steps
Let’s create a more sophisticated template that includes CI/CD setup and demonstrates advanced features like multiple parameter sections, conditional logic, and multiple fetch steps.
Step 1: Download the advanced template files
We need the Techlab Repo: Template Data files.
Download the ZIP file
, extract it and copy / move the backstage-data/templates/fullstack-app folder into the examples folder of your Backstage app.
This curl command will do it for you. Execute it from your app root (my-backstage-app):
curl -L https://backstage-techlab.puzzle.ch/static/backstage-data.zip -o backstage-data.zip \
  && unzip -o backstage-data.zip -d . \
  && mv backstage-data/templates/fullstack-app examples/ \
  && rm backstage-data.zip \
  && rm -rf ./backstage-data/
Analyse the advanced template.yaml
apiVersion: scaffolder.backstage.io/v1beta3
kind: Template
metadata:
  name: fullstack-app
  title: Full-Stack Application
  description: Create a complete full-stack application with React frontend, Node.js backend, and CI/CD
  tags:
    - recommended
    - fullstack
    - react
    - nodejs
spec:
  owner: team-a
  type: website

  parameters:
    - title: Application Information
      required:
        - name
        - description
      properties:
        name:
          title: Application Name
          type: string
          description: Unique name for the application
        description:
          title: Description
          type: string
          description: What does this application do?
        owner:
          title: Owner
          type: string
          ui:field: OwnerPicker
          ui:options:
            catalogFilter:
              kind: Group

    - title: Technology Choices
      properties:
        database:
          title: Database
          type: string
          description: Which database to use?
          enum:
            - postgresql
            - mysql
            - mongodb
          default: postgresql
        includeAuth:
          title: Include Authentication
          type: boolean
          description: Add authentication scaffolding?
          default: true

    - title: Repository Information
      required:
        - repoUrl
      properties:
        repoUrl:
          title: Repository Location
          type: string
          ui:field: RepoUrlPicker
          ui:options:
            allowedHosts:
              - github.com

  steps:
    - id: fetch-base
      name: Fetch Base Template
      action: fetch:template
      input:
        url: ./skeleton
        values:
          name: ${{ parameters.name }}
          description: ${{ parameters.description }}
          owner: ${{ parameters.owner }}
          database: ${{ parameters.database }}
          includeAuth: ${{ parameters.includeAuth }}
          repoUrl: ${{ parameters.repoUrl }}

    - id: fetch-docs
      name: Fetch Documentation
      action: fetch:plain
      input:
        url: ./skeleton/docs
        targetPath: ./docs

    - id: publish
      name: Publish to GitHub
      action: publish:github
      input:
        description: ${{ parameters.description }}
        repoUrl: ${{ parameters.repoUrl }}
        defaultBranch: main
        repoVisibility: private
        deleteBranchOnMerge: true
        protectDefaultBranch: false

    - id: create-github-actions
      name: Create GitHub Actions Workflow
      action: fetch:template
      input:
        url: ./skeleton/workflows
        targetPath: .github/workflows
        values:
          name: ${{ parameters.name }}

    - id: register
      name: Register Component
      action: catalog:register
      input:
        repoContentsUrl: ${{ steps.publish.output.repoContentsUrl }}
        catalogInfoPath: '/catalog-info.yaml'

  output:
    links:
      - title: Repository
        url: ${{ steps.publish.output.remoteUrl }}
      - title: Open in Catalog
        icon: catalog
        entityRef: ${{ steps.register.output.entityRef }}
      - title: CI/CD Pipeline
        url: ${{ steps.publish.output.remoteUrl }}/actions
Key features of this template:
- Multiple parameter sections: Organized form with different categories (Application Info, Technology Choices, Repository)
- Conditional logic: Options like
includeAuthanddatabasethat affect generated code - Multiple fetch steps: Combines skeleton files, documentation, and workflow files
- CI/CD integration: Automatically creates GitHub Actions workflows
Analyse the skeleton structure:
The skeleton folder contains a more complex structure:
frontend/- React application with routing and state managementbackend/- Node.js API with database integrationdocs/- Documentation files.github/workflows/- CI/CD pipeline configurationdocker-compose.yml- Local development environment- Conditional files based on
${{ values.includeAuth }}and${{ values.database }}
Step 2: Register the template
Add the template location to your app-config.yaml:
catalog:
  locations:
    - type: file
      target: ../../examples/fullstack-app/template.yaml
      rules:
        - allow: [Template]
Wait for the catalog to refresh or restart your Backstage app and navigate to http://localhost:3000/create to see your advanced template!
Step 3: Test the template
- Click on “Full-Stack Application”
- Fill in the form and experiment with different options:
- Try different database choices (PostgreSQL, MySQL, MongoDB)
- Toggle the authentication option
- Create the application and explore the generated repository
Warning
You will get an error and stacktrace. This is because your Backstage instance has no right to create Repositories. A GitHub integration is missing for this. We do not cover this here. Find the implementation inside the Additional Labs .Common Template Use Cases
Here are some popular template use cases:
- Microservices: Standard service template with logging, metrics, and health checks
- Frontend applications: React/Vue/Angular apps with routing and state management
- Documentation sites: TechDocs-enabled documentation repositories
- Infrastructure: Terraform modules or Kubernetes manifests
- Libraries: Shared code libraries with publishing pipelines
- Data pipelines: ETL jobs with scheduling and monitoring
Summary
In this chapter, you:
- ✅ Explored existing Backstage templates
- ✅ Created your first software template
- ✅ Built a template skeleton with variables
- ✅ Registered and used your template
Software Templates are one of Backstage’s most powerful features for improving developer productivity. By standardizing project creation, you reduce cognitive load and ensure consistency across your organization.
Next Steps
Now that you’ve completed this lab, you could:
- Make your Software Template work: Do the Additional Labs where you configure GitHub Integration.
- Explore other Core Features: Do the next lab and document your software with TechDocs.